
All of these tasks start on Timetable in the sidebar.
Add a one-off lesson
- Go to the week of the lesson. Use Last, Today and Next in the Navigate panel.
- Select the empty time slot at the start time. For a longer lesson, drag down to the end time.
- In the Create Event panel, check Start and End.
- Leave Event Type on Lesson.
- Choose the student in Student.
- Leave Recurring empty.
- Select Save.
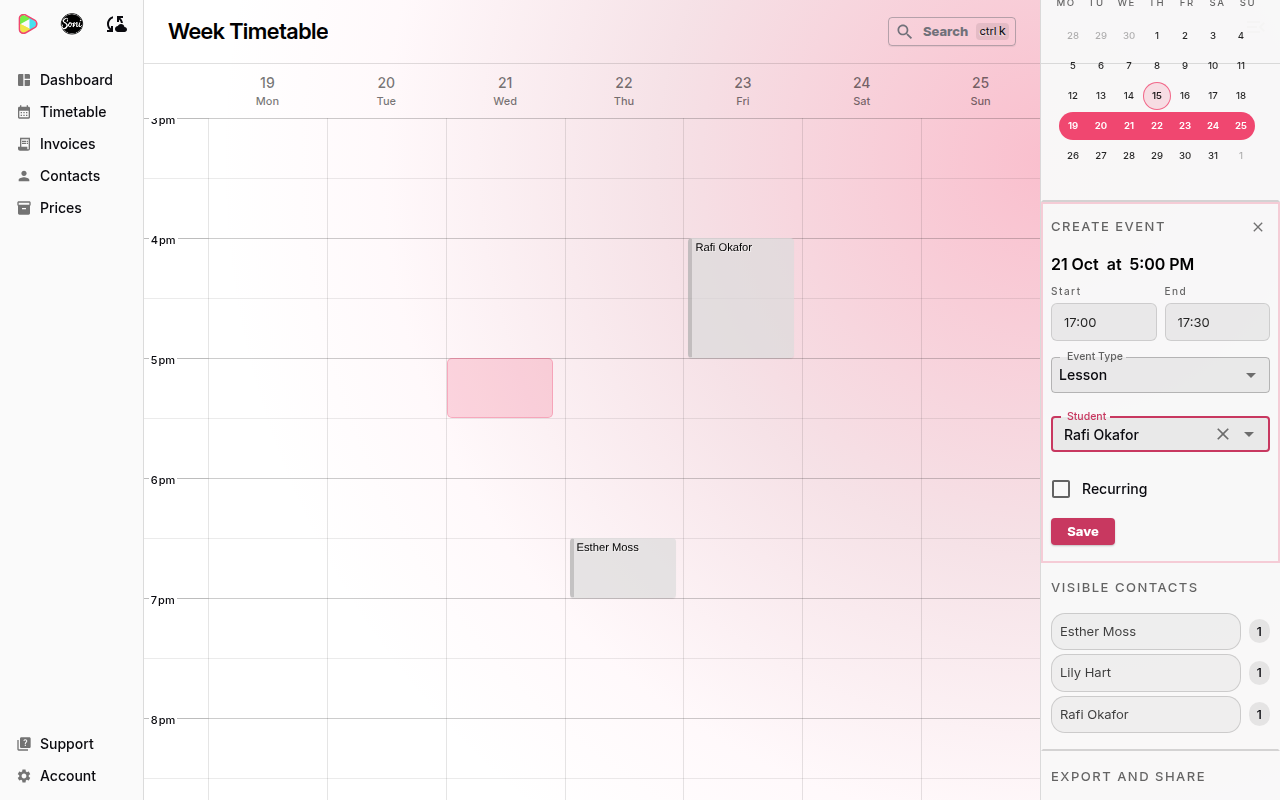
To add a lesson that repeats every week, tick Recurring and enter 1 in Repeat every. See Set up your studio for a worked example.
Move a lesson to a new time
- Drag the lesson to the new day and time on the timetable.
- For a lesson that repeats, choose what to move:
- This event moves only this lesson. The rest stay at the usual time.
- This and future events moves this lesson and every lesson after it.
- For a one-off lesson, select This event.
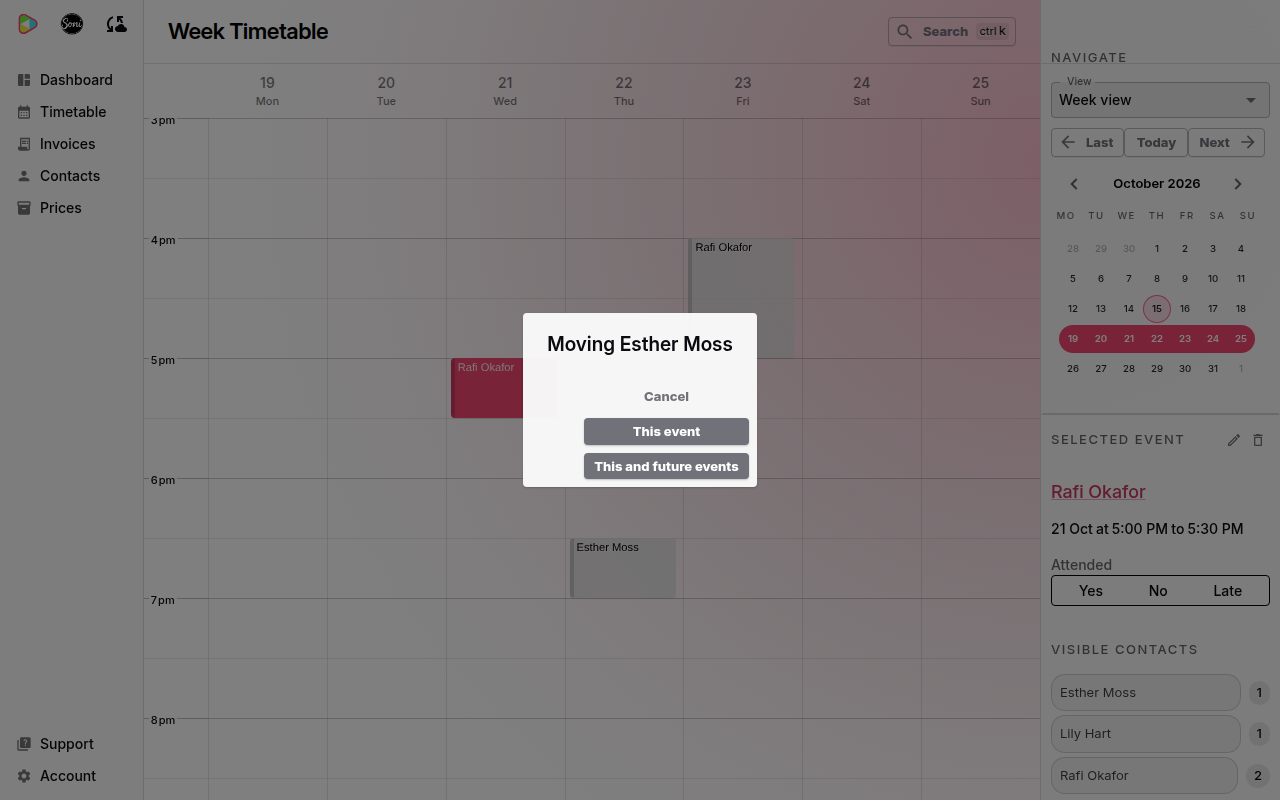
A lesson that is already on an invoice moves the same way. It keeps its line on the invoice.
To move a lesson to another week, open that week’s timetable and add a one-off lesson there. Then cancel the original lesson.
Change a lesson’s time or how it repeats
- Select the lesson on the timetable. The Selected Event panel opens on the right.
- Select the pencil icon (Edit selected event).
- Change Start, End, Recurring, Repeat every or Stop repeating (optional).
- Select Save.
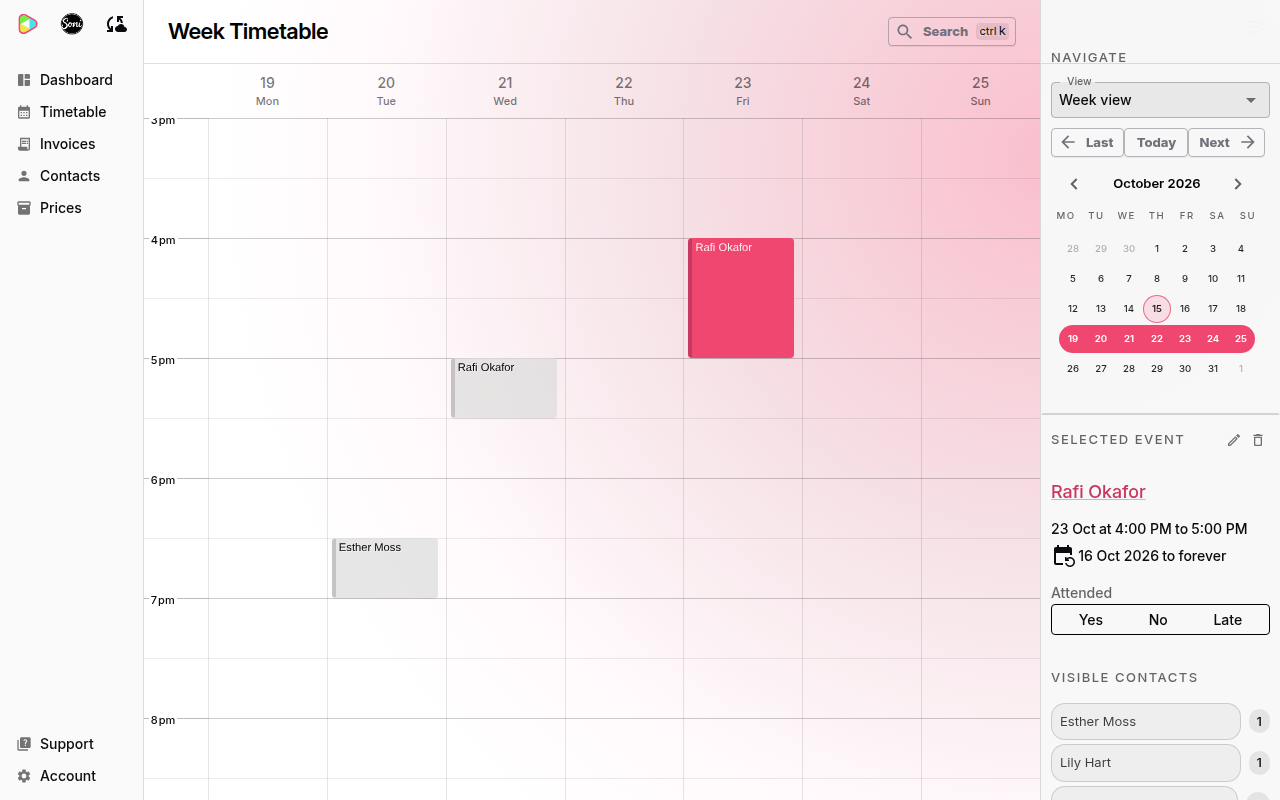
The change applies to this lesson and every lesson after it. The dialog shows the date it starts from.
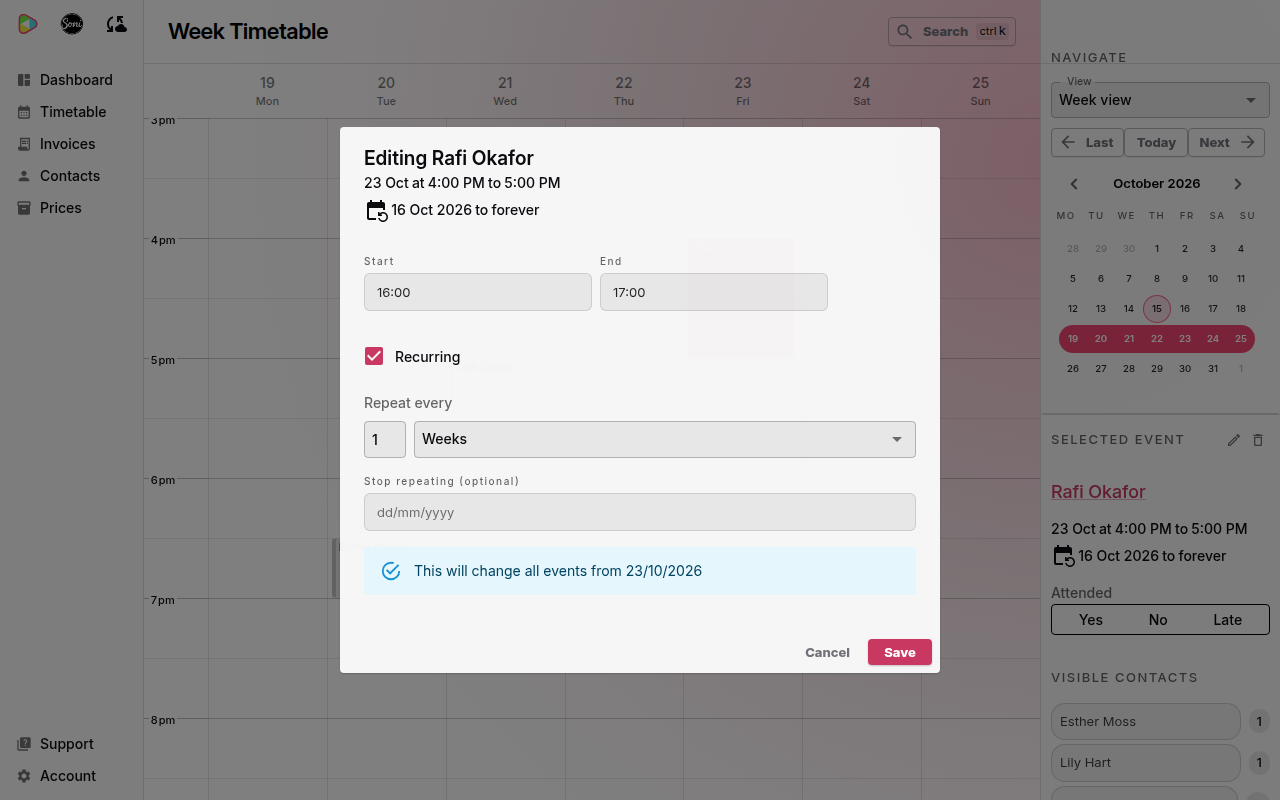
The pencil icon is not available on a lesson you have already invoiced. You can still cancel it.
To stop a weekly lesson from a date, enter that date in Stop repeating (optional). To end lessons with a student completely, see How to end lessons with a student.
Cancel a lesson
- Select the lesson on the timetable.
- Select the bin icon (Cancel selected event). You can also press the Delete key.
- For a lesson that repeats, choose what to cancel:
- This event cancels only this lesson.
- This and future events cancels this lesson and every lesson after it.
- For a one-off lesson, select This event.
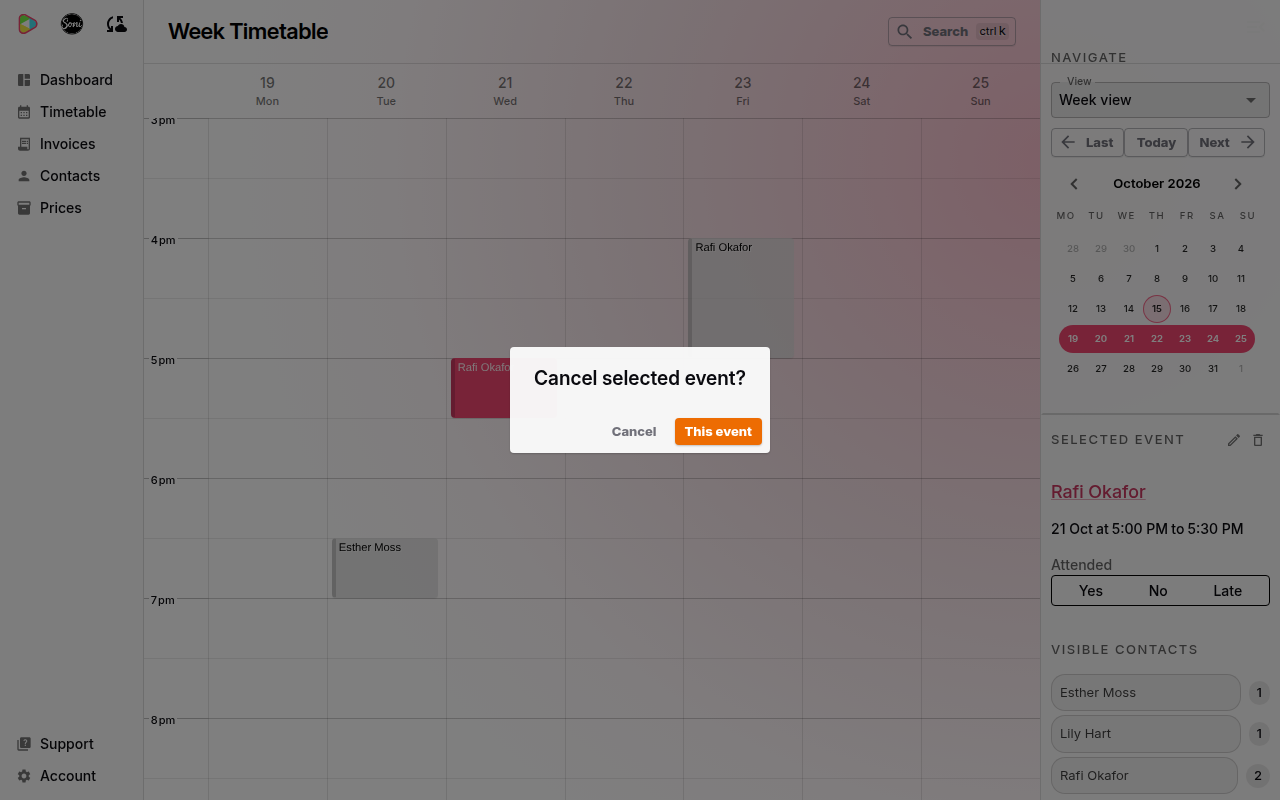
Soniq Studio shows “Event deleted”. The lesson leaves the timetable.
Cancel a lesson you have already invoiced
When the lesson is on an invoice, the dialog asks What happens to the money?
- Choose one option:
- No adjustment: nothing is owed back.
- Owe a makeup lesson: adds a lesson credit for the family.
- Refund the money: adds a refund to a draft credit note. This option is available only after the family has paid the invoice.
- Enter a Reason (optional), for example “Teacher unwell”.
- Select This event or This and future events.
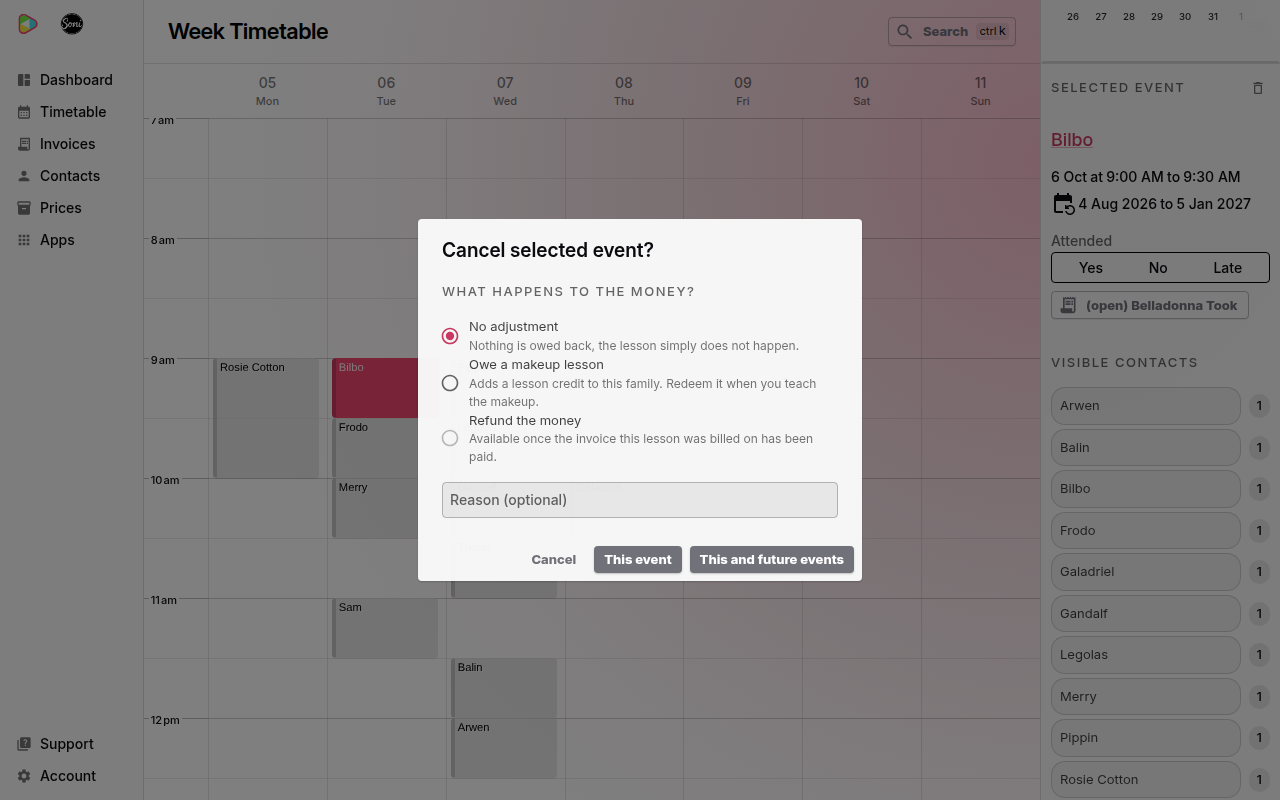
Soniq Studio shows “Lesson cancelled”. With Owe a makeup lesson, it shows “Lesson cancelled and a makeup added”.
To use a lesson credit later, select the replacement lesson on the timetable. Select Give as a makeup in the Selected Event panel. Soniq Studio does not invoice that lesson.
For a refund, open the draft credit note to send the money back. See How to issue a refund or credit.
Related
- Why timetables are forgiving explains why one change leaves the rest of your week alone.
- Lesson and schedule fields lists every field on a lesson.